|
24 Oct
|
V5 received from DVLA last week. Number plates ordered straightaway
and now delivered. Christopher Neils have made good progress over the last
couple of weeks and a visit today saw the car freshly painted, though still
with doors, boot and bonnet to complete.
   |
|
06 Nov
|
Collected the car last Friday – very pleased with the paint job
(thanks Kevin, at Christopher Neils).
   |
|
16 Nov
|
Overriders are now fitted front and rear, and the new reverse and
foglamps. Nothing’s wired up yet though! I’ve had to spend some time fitting
the tonneau - due to kitchen fitting
starting on 26th, access may be required to the garage – in which
case, rain or shine, at least half the car needs to move outside. The
position for the fasteners was clearly marked on the tonneau, though a couple
needed slight adjustment. No great difficulty in fitting the lift-the dot
fasteners in the tonneau, even without the special punch – it’s really not
necessary.
The male fastener pins around the back of the cockpit weren’t too
difficult – each is located with a small fibre washer insulating it from the
paint, and fastened through the fibreglass with a washer and locknut. Note
that the fasteners supplied by Gerry were too short with only 10mm threaded
length, and I obtained some with a 15mm shank which were fine. The front fasteners
fitted through the scuttle top and except for the outer pair, landed just on
top of the dash. This needed moving to allow locknuts to be fastened on the
back. The outer pair of fasteners needed some spotfacing under the scuttle to
allow the nuts to seat properly.
I’ve now fitted the gearbox cover made for the BMW-engined Aces – it
fits the gearlever position perfectly, which now has the Cobra rubber boot
gaiter and stainless retaining ring.
|
Sunday, 16 November 2014

Friday, 10 October 2014
25 August
|
Made a pressure bleeding adapter from some alloy bar, a piece of
radiator hose and a couple of jubilee clips, and managed – with a bit of
leakage from around the top of the reservoir – to bleed the front brakes. The
pedal now feels much improved.
I’ve offered up the sidescreens, shortened them and drilled and
located the ferrules. I used a woodworking fixture to pilot the hole normal
to the curvature of the door skin. I’ve bolted the ferrules through with 1/2”
UNF nuts and capped off with rubber covers in case of an issue at IVA retest.
I’ve discovered the screen alignment isn’t perfect –something to address
after painting.
  
I’ve made ferrules for the hood sticks – something missing from
Gerry’s hood kit!
|
08 Sept
|
Today passed my IVA re-sit! A real landmark!
The examiner – not the same one as for my original test – looked at
all the points addressed, wheel arch extensions, different seats, locknuts on
steering and suspension components, spacer on Panhard rod, wash bottle firmly
tied. The rear fog lamp was tested, as was the field of view through the
mirrors. The brakes were tested again to check nothing had got messed up.
I’d arrived just over an hour early, but I was seen to as soon as I’d
got the car off the trailer, and by the time my booked appointment was due, I
was putting the car back on the trailer again, ready for home!
Overall I found the IVA process fair enough, the examiners at
Chadderton were polite, professional and helpful. Nevertheless it was quite stressful worrying about the
possibility of a second failure!
Other things – I finally collected the elusive cockpit carpet set and
‘BMW’
gearbox cover from Gerry at
the Donington kit car show. At least this gave me an excuse to have another
close look at the Ace on the Hawk stand. Using some budget carpet I already
had I’ve been trimming the boot, complete with lift out plywood cover for the
spare wheel . Nothing’s glued in place yet but loose fitted it all looks
quite passable.
|
10 Oct
|
The car’s still being prepared for painting – I took a couple of pictures
at Christopher Neil’s bodyshop.
  
After three weeks DVLA seem to have discovered my application and a call
from them this week confirmed it was being processed. Fingers crossed!
|
Monday, 11 August 2014
IVA - first attempt!
|
24 July
|
IVA yesterday. Quite an experience! A relatively small number of
issues raised, requiring a retest already booked for September. Good news is
that brakes, lights, interior and exterior projections all passed OK, the
exhaust was quiet, just 86dB. Minor issues were that the connection to the
rear fog light had come adrift, the washer bottle wasn’t properly locating in
its holder, and some locknuts are required to augment the steering rack and
front suspension attachment. A nearside mirror is required as the interior
mirror was judged too small for an adequate field of view.
Slightly more tricky, the Panhard rod fouled the diff cover plate. I
hadn’t noticed this, and think it was only evident because I had a full tank
of fuel for the first time. Should be able to resolve this with some
additional spacers, but clearance is tight between cover plate and spare
wheel well.
I’d fitted the MX-5 seats and looped the seatbelt through the guides
on the shoulder of the seats. This meant that the seat belt runner was higher
than the mounting point, which means the seat is in compression in the event
of an accident, which it wasn’t designed for and is unacceptable. I think if
I remove the belt runner from the seat, or just swap them over, and remove
the subframe I’ve used between seat and floor, I can make it acceptable.
Needing a bit more headscratching – the rear wheel arches don’t quite
cover the tyre as they should, which requires some ingenuity to attach some
sort of narrow mudflap over the rear section of the arch.
The front brake flexible hoses are stretched on full lock – despite
having been supplied specifically as MGB upgrade items. I think I need hoses
about 50mm longer.

All this should be able to be sorted out in time for the booked
retest on 8th September.
|
|||||||||||||||||||||
|
02 August
|
I’ve dealt with the more minor issues from the IVA test – steering
and suspension bolts passing through the threaded plates supplied by Gerry
now have locknuts, with some thread protruding. I’ve raised the position of
the wash bottle so it no longer fouls the chassis, and secured it to the
bracket with a cable tie. A connector had pulled off the foglight wiring,
which I’ve re-soldered and checked.
I’ve fitted the nearside mirror, and raised the position of the
offside mirror so the rear view isn’t obscured by the rear wing (an
unrecorded comment from the inspector). I’ve obtained some longer front brake
flexible hoses which weather permitting I’ll fit tomorrow.

That leaves a couple of issues over which I’ve exchanged some
correspondence with Gerry: I’ve given the Panhard rod some clearance from the
diff cover by fitting a half-inch spacer and longer bolt at the axle end of
the connection. The clearance loaded is now around a quarter-inch, which
should be OK even down to the bumpstops. Gerry was surprised and queried
correct fitment, he’s only occasionally had to use a single spacer washer.

Gerry was also surprised about the rear wheel arches – this point
doesn’t seem to have arisen before. However, I have the correct wire wheel
axle, adapter hubs, and the wheels and tyres supplied by Gerry. The track
(which is easy to measure on the trailer) is the same as that quoted for the
MGB. The photograph shows a cardboard extension fixed in place to show the
extent of the non-compliance – which is a maximum of 15mm.
After some deliberation I decided against progressing with the Mk.3
MX-5 seats. I felt their size might mean the seat belt still rubbed on the
seat even if the guides were reversed or removed. I’ve got hold of a couple
of early MX-5 seats in good condition that will fit more easily, without
modification except to remove the adjustable runners, and with more room
around the belts. The seats are smaller, with adjustable headrests. I’ve made
a gauge to check the compliance with the IVA manual, for both minimum height
and distance to seat belt anchorage. On both counts the measurement seems
comfortably within the criteria. If the sun keeps shining today I should get
them both fixed in.
While fitting seats seems a simple job, the length of time required
to do it properly shouldn’t be underestimated. Due to the location of chassis
members the attachment bolts can’t always be fitted to correspond with the
seat tappings, so some form of subframe is usually required which needs to be
sufficiently robust. Although the seats in the Hawk don’t transmit the
seatbelt loads, it’s surprising how much load does pass through the seat
attachment – just try braking hard without the bolts in place!
The omission of the adjustable runners isn’t an issue for me. The
Hawk isn’t designed to fit large people, and while I’m not tall I need the
seat as far back as it will go.
  |
|||||||||||||||||||||
|
03 August
|
Fitting the seats:
This took much of the day, but the seats are securely fitted and
appear to be IVA compliant. The seat belts fit without rubbing the seats. I
took some measurements to compare with IVA requirements:
  |
|||||||||||||||||||||
|
11 August
|
New front brake hoses are fitted. I’ve got some ideas for adapting the
fluid reservoir for pressure bleeding, which is my preferred method, so I’ll sort
this in the next week or two. Made and fitted the wheelguards required for the
IVA. They’re quite rigid and don’t look too bad.
 
That’s all the failure points
addressed now.
|
Sunday, 6 July 2014
Towards the MoT
26 April
|
The brake master cylinders have now been ‘bench bled’ (though without
removing them), and the feel is much better. I’ve dispensed with the three
individual fluid reservoirs. They were prone to leakage and made access to
the master cylinders difficult. I now have a single reservoir bolted to the
back of the wheelarch.

The carburettor’s been stripped and cleaned, air passages and jets
blown through, though with no obvious fault spotted. I measured jet sizes and
replaced one of the primary jets with one from my tuning kit which better
matched the size of the other. I’ve also measured all plug lead resistances
and re-checked coil resistances, etc. and found no fault. I’ll have another
go at running the motor next week and see if I can narrow anything down.
|
01 May
|
Made some passenger seat supports from aluminium channel, and also
cut some for the MX5 seats. I’ve been trying to find a way of not drilling
additional holes in the floor for the MX5 seats, but think this is going to
defeat me.
Gerry’s header tank and support bracket delivered. The bracket mounts
it a couple of inches too low – it needs to be the highest point in the
system. A couple of plates can be made out of aluminium to raise it up to the
level where the previous tank was mounted. Other than that, the Rover top
hose can be cut in two to fit both into and out of the header tank. The fan
thermoswitch, I now realise, screws into the boss at the top of the radiator.
All in all, the cooling system is simplified with fewer joints.
 
I’ve fitted a valve in the fuel tank vent, one that operates both
ways at a small pressure. This should help to stop the fuel smell, but was a
bit expensive.

At last a communication from Speedy Cables to say the speedometer
should be ready by the end of next week. They really haven’t lived up to
their name, this was sent to them on 21st February!
|
04 May
|
The engine’s been running again (after replacing a blown diode
bridge). No sign of the previous misfire, but still a lot of top-end clatter
to be investigated. Cooling system almost completely continent! The dwell’s
checked OK at around 35 degrees.
Checked the wipers with the engine running – unfortunately the fast
speed isn’t sufficiently faster than the slow speed to comply with IVA
requirements, so I’ve ordered a new motor. I’ve also ordered some switch
identification stickers.
Spent some time making seat brackets to adapt the MX-5 seats. The
seats sit very low and are compliant with IVA requirements for seat belt
height with a good margin – nearly 2 inches!
More time spent bleeding the brakes. Hopefully getting a bit less
spongy.
|
13 May
|
Fitted the new wiper motor, notable increase in speeds, though not
yet checked frequency. Speedometer received back, calibrated, and fitted.
Spent a bit of time tidying under the bonnet, and some time on seat frames
and locations to aid transfer of the MX-5 seats.
The fuel pressure gauge doesn’t work properly despite now being
correctly wired. It really needs some advanced diagnostics, though currently
I’m suspecting the sender unit. It seems to give an output voltage of around
200mV when the fuel pump’s on, which sounds much too low.
I’ve been filling in forms and collating paperwork in preparation for
sending off with the IVA application. Probably do this when I’m back from
holiday in a couple of weeks. There’s really not too much left to do on the
car.
|
10 June
|
Big step forward is I submitted the IVA test application a week ago.
This coming Saturday I’m trailering the car to my MoT garage for a sort of
pre-MoT and to help me balance the brakes. Worked out I needed to trailer the
car around six times (maybe more) so in the absence of a very local hirer
I’ve bought secondhand a neat Brian James four-wheel trailer which fits in the garage.

I’ve spent a bit of time ‘snagging’ and getting things in order for
the test, ensuring all wiring’s covered in convoluted conduit, bolts are
sticking through nuts properly, and pipes and wiring are well supported. I’ve
also obtained a new timing light and gastester to replace my 30-year-old ones
which didn’t work any more! I’ve
adjusted the timing to 10 degrees BTDC static, vacuum advance disconnected. I
think this is a reasonable starting point. I’ve adjusted the carburettor to
give CO levels of around 3% which is well within the allowable for the age of
engine.
I’ve started to cut out footwell carpets from a roll I got cheap at a
local autojumble. Although patterns are now made for my own, I’m not
confident of them being finished before IVA test time.
Still some niggles – the engine rattle being the largest, sounds
tappety but I’ll get a view from Andy at Grappenhall Motors on Saturday. Not
yet fixed the fuel pressure gauge, though I’m suspecting a faulty sender
unit, and the float on my fuel gauge sender has sunk! I’ve sent for a brass
replacement from Moss.
|
05 July
|
The ’pre MoT’ was a proper MoT – which I failed on brakes, rear brake
and handbrake efficiency too low. The trip also revealed some persistent
clutch drag which caused dome difficulty engaging first and reverse. A second
visit with tightened handbrake didn’t turn out much better. I puzzled over it
for a while – then realised I’d been misled into believing I needed a strong
bias towards the front brakes. The set up I’ve got is MGB – the original MGB
had single-line hydraulics, with no pressure limiting valve, so the balance
bar setup should be 50:50 front to rear. However, my Hawk has a little more
rearward weight bias, and has high friction (Greenstuff) front pads –so I
need a little bias to the rear – not too much, which would upset the IVA.
I’ve gone back to first principles to calculate the setup – I may
send this to Phil to see if he thinks it’s worth publishing.
I swapped the 0.7” master cylinder on the rear brake line with the
0.625” clutch master cylinder, and adjusted the balance bar to give
approximately 53% bias to the rear brakes. This solved both problems – the
clutch operating lever has more stroke and now allows quiet and easy
engagement of all gears, and the brakes passed the MoT today!
Rear drums have been drilled with inspection holes in case the IVA
people are applying the letter of the regulations.
 
The MoT emissions test showed that somehow my CO emissions were less
than 1%. So much for the Gastester. I increased them to a healthier 3%!
I’ve spent some time with carpets to make the interior look a bit
presentable while I wait for Gerry’s carpet set to be produced, though
there’s a bit more to do. I’ve sorted the fuel gauge with a new float. I’ve
tidied up a number of loose ends in advance of the IVA test – which is booked
for 8:00 on 23 July.
 |
Friday, 18 April 2014
Almost working .....
|
14 Mar
|
Just about finished covering the steering wheel - looks almost modern. Also been working to
wire ammeter (needs testing), and new foglight switch to comply with latest
IVA. Sourced some new washer jets with adjustable nozzles – the previous ones
with fixed nozzles aimed too low. Spent some time on hydraulics, bleeding
brakes and clutch.
Found the front overrider support brackets don’t line up with where I
think the overriders should be and will have to have some drop plates fitted
to lower the level by a couple of inches. There are a lot of fiddly
activities at the moment, lots of time spent achieving not much!
I need to check the tappet clearances – the rough running of the left
bank was I suspect due to low compression on one or more cylinders due to the
valves not closing. One of the heads had more valve seat work than the other,
which may have to be compensated by shims under the rocker pillars.
|
|
17 Mar
|
Steering wheel’s finished and in place, but the padded boss looks a
bit naff and rather spoils the effect. I wonder if I can do something a bit
better?
The foglight switch and control is fitted and working.
I’ve also removed the carburettor and inlet manifold to check the
follower preload. I can see that it’s too high on No.3 cylinder, which I
already suspected of poor compression. I’ll do the checks slowly and
carefully over the next few days.
|
|
31 Mar
|
Obtained an MGB steering wheel padded boss, which as luck would have
it fits the steering wheel perfectly!
 
Four panels have been made in aluminium to fit under the dash, and
covered with leathercloth. These can’t be finally fitted until last – when
all the wiring’s fully sorted, the instruments are properly fixed and the
speedometer’s back from calibration (‘Speedy’ cables are taking forever – 5
weeks so far and a further delay of 3-4 weeks).
Tried shimming the rocker shafts to correct follower preload, but not
able to get all followers within tolerance. Shelled out for adjustable
pushrods, which are now fitted and adjusted.
Unfortunately having adjusted the preload, I tried the engine again (Mon
31st March), and the symptoms are unchanged. Time for some serious
diagnostics ….
Also tried while the engine was running, the clutch – I wasn’t very
convinced by the feel and sure enough it doesn’t disengage properly. I think
I’ll have to take the hydraulics apart, but first of all I might try to
disengage it mechanically to check the amount of axial movement required.
The delay with the speedo and the issues with the misfire and clutch
are delaying the time when I feel comfortable to book the IVA test.
|
|
05 April
|
Improved the rigidity of the fog lamp and reversing lamp by making a
small bracket to hook under the lip of the rear valance, fixed to the back of
the lamp and to the main attachment point. They feel nice and rigid now, not
forever being spun round every time I brushed against them!

I’ve also made a VIN plate. It looks just about passable, and the
text is large enough.
Some detailing – I’ve fitted a Tecalemit 2800 model grease gun in the
appropriate place under the bonnet. I think it will be decorative – can’t
beat my Wanner for any serious greasing!
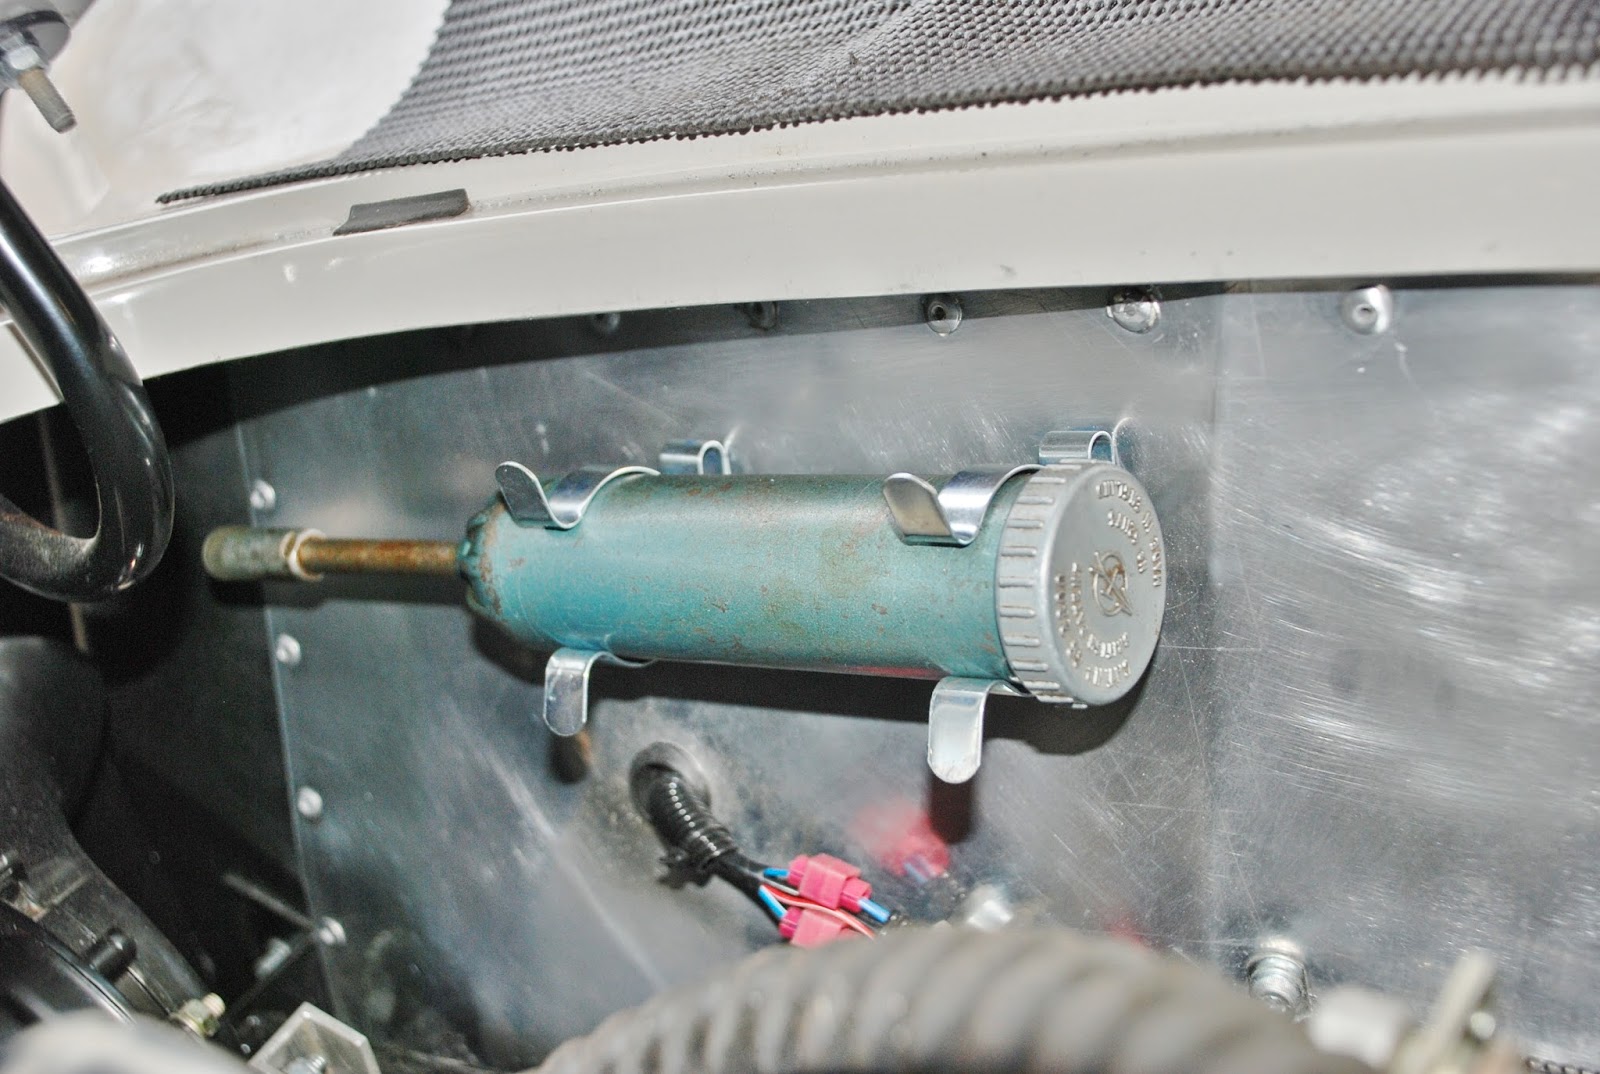
I’m now waiting for a fine day when I can get the car in the drive
and start to tackle the mechanical issues. I think the clutch will come
first.
|
|
13 April
|
Main job over the last week has been to tackle the clutch. This
involved removal of exhausts and propshaft, then separation of the
bellhousing from the engine and
partial withdrawal of the gearbox. I had the front end jacked high enough to
give access without complete removal of the gearbox. It was clear to see what
the problem was, the release arm was fouling the side of the bellhousing, but
what caused the misalignment wasn’t clear at first, but was probably some
incorrect assembly where the release fork met the thrust bearing. The pivot
pin was the correct one, 43mm outstand. Funny thing was, after very carefully
reassembling everything – and this isn’t easy – and reconnecting the
bellhousing, I got exactly the same symptoms, with only half a stroke of
pedal travel. I removed the slave cylinder and pushed the pushrod in and out
a few times, something seemed to fall into place and the pushrod didn’t go
back quite as far. I reconnected the slave cylinder and hey presto, full
clutch travel! As I had the propshaft off it was easy to check that the
clutch was disengaging properly.
A tip for anyone fitting the release fork: assemble the fork and
slipper pads to the release bearing before offering up the fork to the
bellhousing. The assembly can be held together with cable ties, elastic bands
or lockwire to be removed after installation. The pivot pin can be screwed
into place after locating on the release fork, and tightened with a shortened
or adapted spanner. Don’t forget to fit the pushrod before offering up the
release fork to the bellhousing.
While the exhausts were off I took the opportunity to make some final
adjustments and seal the joints with assembly paste, all except the
manifold-to-downpipe joint, which I’ve left untightened at present ‘just in
case’. I’m also improving the action of the handbrake, to get rid of some
internal binding of the compression spring, and contemplating making some
aluminium seat subframes that will adapt the MX5 seats to the existing floor
drillings.
|
|
17 April
|
Glorious Good Friday, spent working in the sunshine!
Front over-riders: made up some aluminium drop plates to lower the
over-rider supports, drilled the locations alongside the grill and trial
fitted the overriders. They look just about right, but of course will have to
come off again for the IVA test.

The handbrake actions been improved with some internal mods moving
the compression spring. The action is now more reliable.
Bled the brakes again by pressurising each system, but although no
bubbles at the wheels, I still must have air in the master cylinders as the
feel and action is poor. These will have to be disconnected and bled
individually like I did with the clutch.
For the first time the car’s moved under its own steam. Only to turn
in the road and re-enter the drive though! The clutch seems to work OK but gear
engagement was difficult. For now I’m putting this down to lack of oil circulation
through the gearbox, rather than any mechanical defect, and hope that it gets
better! I’d wired a test strobe in series with the plug for the suspect No.3 cylinder
when I fired up the engine, which flashed away giving me no cause to suspect the
spark. I removed the plugs and carried out a compression test, first on No.3,
expecting to find a low reading. I got 140psi which I was reasonably happy with,
though! Other cylinders varied between 150 and 165psi. Finally I repeated the
test on No.3 and it gave 155psi. I think overall the range is reasonable and low
compression isn’t a cause. I’ll probably check the carburettor next – I remember
my old Scimitar regularly blocking a jet and running rough.
Another concern is there’s a knocking coming from the engine, not sure
where, but now the exhaust joints have been quietened it seems louder. Further
investigation due.
|
Friday, 28 February 2014
Valentine's Day startup!
19 Jan14
|
Battery connected and testing started. Lights look OK with the
exception of the headlamp dipswitch, windscreen wipers don’t work and the
heater fan blows a fuse! Altogether at least as good as I expected!
Troubleshooting begins ….
|
||||||||||||||||||||||||||||||||||||||||||||||||||||||||||||||||||||||||||||||||||||||||||
09 Feb
|
Managed to sort out most of the electrics. The fan wiring was messed
up, I’ve now got it running but only on a single fast speed. The wipers
didn’t work properly with the rotary switch I was using (advantage being it’s
marked ‘wipers’) but after changing the brushes, fitting a new park switch
and 130 degree wheel to the motor unit, it’s now working with the
two-speed-and-park switch supplied with the loom. I need to check the speeds
are OK for IVA.
I’ve adjusted the float in the tank sender, after it was obvious it
was bottoming and giving a reading of quarter full when empty.
I’ve spent some time on the exhaust – not a great pleasure given the
recent poor weather and cramped garage access, but now much happier with the
fit-up, though getting a ground clearance of much over four inches is
challenging.
I’ve been focussing both on getting the engine ready for starting,
and on the IVA requirements. The engine’s now about ready – I’m not happy
with the arrangement of the cooling system really, having seen how many
joints I’ve ended up with. It’s now almost leaktight (at least
unpressurised). The sump’s filled with Halfords Classic 20/50 – which looks
remarkably like Duckham’s – and I’ve primed the pump with an electric drill
until 40psi on the gauge.
I’m just waiting to sort out the ballast resistor ignition circuit. I
looked at a number of diagrams on the net, but only one (MGB-V8 site)
correctly showed the need for a diode bridge. Without this, the starter runs
as soon as the ignition key’s turned to the first position. It’s actually
obvious from the various circuit diagrams I looked at, that as soon as the
ignition’s on, the current runs to the starter solenoid, but I made the
mistake of wiring it that way first. The kit needed is a 35A Diode Bridge
KBPC 3504, which costs buttons from Maplins. I’m just waiting for this and
then – fingers crossed – should be able to fire up.
I called at the petrol station to fill my two-gallon Valor can with
petrol (I do this every year for the lawnmower – always half expecting to be
refused, as although the can has held petrol continuously for over 75 years
it’s considered ‘non-PC’ these days!) which has been transferred to the tank.
I’ve run the pump to prime the filters and carburettor, fixing the inevitable
couple of leaks. Also turned the engine over a few times – without plugs – on
the starter motor.
|
||||||||||||||||||||||||||||||||||||||||||||||||||||||||||||||||||||||||||||||||||||||||||
16 Feb
|
Diode bridge arrived and I fitted it onto an aluminium backplate with
the ballast resistor, wiring it to a piggyback connector to the ‘start’
terminal of the ignition switch.

Valentine’s day – 14th – was historic, I reset the
ignition timing approximately, and the engine fired up quite readily, though
with blowing exhausts, water drips from hoses and a biblical oil leak from
the oil pressure gauge connection. Also a bit of an intermittent misfire from
the left bank. All in all, no worse than expected!
Next job is to get the clutch working. I’ve got a 5/8” master
cylinder with the Rover 7/8” slave cylinder, which means the stroke at the
slave is approximately half the stroke at the master, which seems to be about
1¼”. So far not much success bleeding the system – but I think I know why.
I’ve been using a vacuum pump which of course is drawing the slave piston
AWAY from the operating rod – I need to use a pressure system which forces
the slave piston onto the operating rod. As the rod stroke is only going to
be 5/8” this is quite critical!
Watch this space.
|
||||||||||||||||||||||||||||||||||||||||||||||||||||||||||||||||||||||||||||||||||||||||||
23 Feb
|
After some more concerted bleeding – the clutch may be working –
although the engagement seems a long way down the pedal travel. Hard to tell
until the engine’s running again and I can try and get it in gear. Think I’d
like the brakes functional too, first ….
Made a collapsible hub, with the intention of satisfying the IVA
requirements, but as it actually looks quite good I think I’ll retain it.
 
The
solid boss obtained from Scarborough Racing Developments is machined right
back to leave only the spline adapter and flange; this is drilled with four
6.5mm holes to suit the PCD of the rear face of the collapsible hub unit I
got from Europa Spares. At the business end I machined an adapter flange from
aluminium plate which mates with the collapsible hub and the steering wheel.

I’ve trial fitted one of the seats from the MX-5, which seems to give
an acceptable vertical height from the seatbelt anchor point. It may be best
fitted via an adapter frame to make best use of hole drillings. I’ll set some
time aside for this just before the IVA test, now I know it’s a goer.
|
||||||||||||||||||||||||||||||||||||||||||||||||||||||||||||||||||||||||||||||||||||||||||
24 Feb
|
Got to grips with the front suspension. I’m replacing the ‘pattern’
wishbone arms with refurbished OE items; the pattern parts haven’t got the
inner pivot bush welded on squarely, which doesn’t look good and while it may
or may not affect the suspension performance with rubber bushes it would
preclude any later fitting of poly bushes.
The front ride height’s always seemed an inch or so too high; I
thought this might be due to wind up in the rubber bushes, but also could be
due to incorrect springs. I carefully measured the spring when removed, and
calculated the length under load. Due mainly to being too long (10.3” free
length, rather than 9.9” for the pre-’72 roadster OE item), the length under
load comes out at between 0.4 and 0.5” longer than the OE spring (AHH6451).
Factored up taking into account the intermediate position of the spring along
the wishbone, this accounts for 1” of additional ride height. I now have a
pair of AHH6451 springs on order and hope this sorts the problem.
|
||||||||||||||||||||||||||||||||||||||||||||||||||||||||||||||||||||||||||||||||||||||||||
26 Feb
|
OE springs delivered amazingly quickly from Sussex Classics, offside
spring fitted. Springs are approximately 0.5” shorter than those from MGBHive
and have a smaller wire diameter (0.5” not 0.515”). This should cure the ride
height issue.

For anyone interested in the spring / ride height calculation - here it is:
Reflectors relocated to where the upper over-rider support’s going to
be. They now face squarely rearward.
|
||||||||||||||||||||||||||||||||||||||||||||||||||||||||||||||||||||||||||||||||||||||||||
28 Feb
|
Finished the front suspension, pleased to say that fitting the OE springs
has completely cured the ride height issue, lowering the front by about 1.75”
and leaving the indicators just above the minimum required height for the IVA
test (350mm).
Also fitted N/S pads and bled the brakes, front and rear. I think they
need bleeding some more to improve the pedal feel, but was able to test the pressure
switch and brake lights.
|
Subscribe to:
Posts (Atom)